Tutorial 1 - Blink an LED
Learn how to make an LED blink using an Arduino. This is the classic first project that introduces you to digital output and timing with delay().
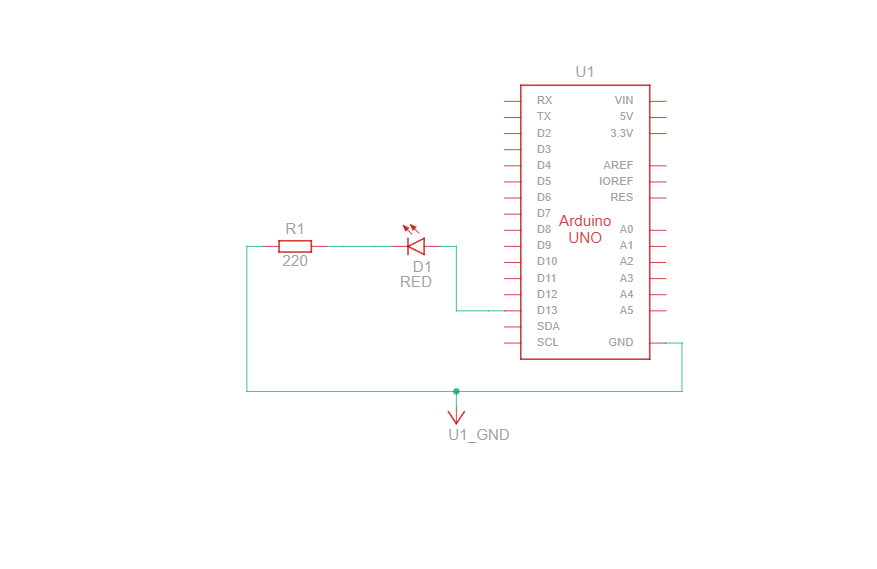
Circuit Diagram
💡Tip: Pin 13 has a built-in LED too, great for quick testing without any components, and it'll still blink!
What You'll Need
- Arduino Uno x 1
- Breadboard x 1
- LED x 1
- 220Ω Resistor x 1
- Jumper wires x 2
- Arduino Uno USB Cable A to B x 1
- Arduino IDE installed
Instructions
- Connect the long leg of the LED (anode) to digital pin 13 on the Arduino.
- Connect the short leg (cathode) to one side of a 220Ω resistor.
- Connect the other side of the resistor to GND on the Arduino.
- Plug your Arduino into your computer using the USB cable.
- Open the Arduino IDE, and paste in the code below.
- Under Tools, select your board type and COM port.
- Click Upload. Your LED should start blinking!
The Code
void setup() {
pinMode(13, OUTPUT); // Set pin 13 as an output
}

void loop() {
digitalWrite(13, HIGH); // Turn LED on
delay(1000);            // Wait 1 second
digitalWrite(13, LOW);  // Turn LED off
delay(1000);            // Wait 1 second
}
Schematic Diagram
Schematic diagrams show how current flows and how components connect logically, not just physically.