Tutorial 3 - Dimming an LED with a Potentiometer
Learn how to control the brightness of an LED using a potentiometer. This teaches you how to read analog input and write analog output using Arduino's PWM functionality.
Circuit Diagram
💡Tip: If your LED doesn’t dim smoothly, double-check that the LED is on a PWM-capable pin ( ~3, ~5, ~6, ~9, ~10, or ~11). Not all digital pins support brightness control.
What You'll Need
- Arduino Uno x 1
- Breadboard x 1
- LED x 1
- 220Ω Resistor x 1
- Potentiometer (10kΩ recommended) x 1
- Jumper wires x 7
- Arduino Uno USB Cable A to B x 1
- Arduino IDE installed
Instructions
- Place the potentiometer on the breadboard.
- Connect one outer pin of the potentiometer to 5V, the other to GND.
- Connect the middle pin (wiper) to A0 on the Arduino.
- Connect the longer leg (anode) of the LED to digital PWM pin 9.
- Connect the shorter leg (cathode) through a 220Ω resistor to GND.
- Connect jumper wires (GND & VCC) from the breadboard to GND & VCC on the Arduino.
- Plug your Arduino into your computer using the USB cable.
- Open the Arduino IDE, and paste in the code below.
- Under Tools, select your board type and COM port.
- Click Upload and watch the LED brightness change as you turn the knob!
The Code
void setup() {
  pinMode(9, OUTPUT);  // LED pin
}

void loop() {
  int sensorValue = analogRead(A0);       // Read potentiometer value (0-1023)
  int ledBrightness = map(sensorValue, 0, 1023, 0, 255); // Map to 0-255
  analogWrite(9, ledBrightness);          // Set LED brightness
}
Schematic Diagram
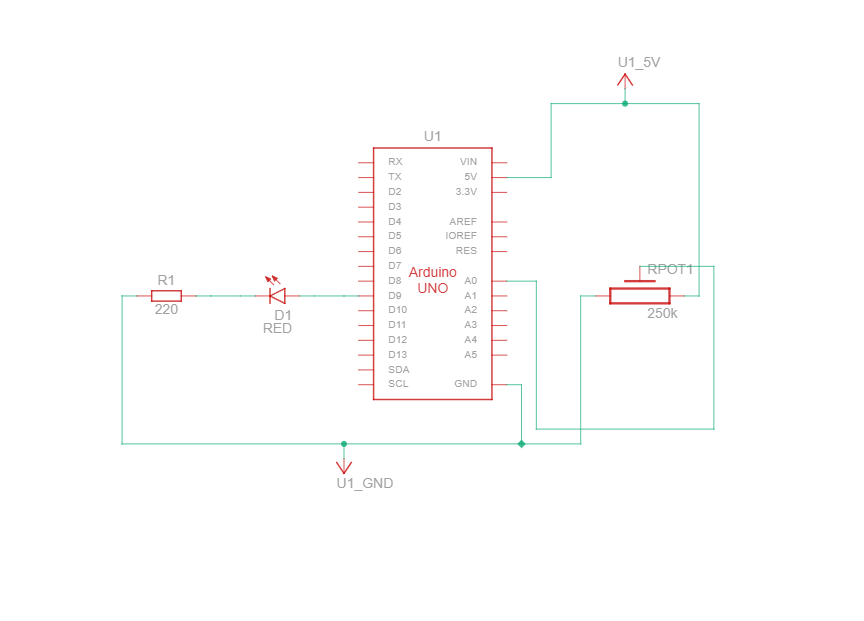
Schematic diagrams show how current flows and how components connect logically, not just physically.