Tutorial 2 - The Liquid Crystal Display (with I2C backpack)
Learn how to display text using an I2C LCD screen with Arduino. This intermediate tutorial introduces the LiquidCrystal library and LCD wiring.
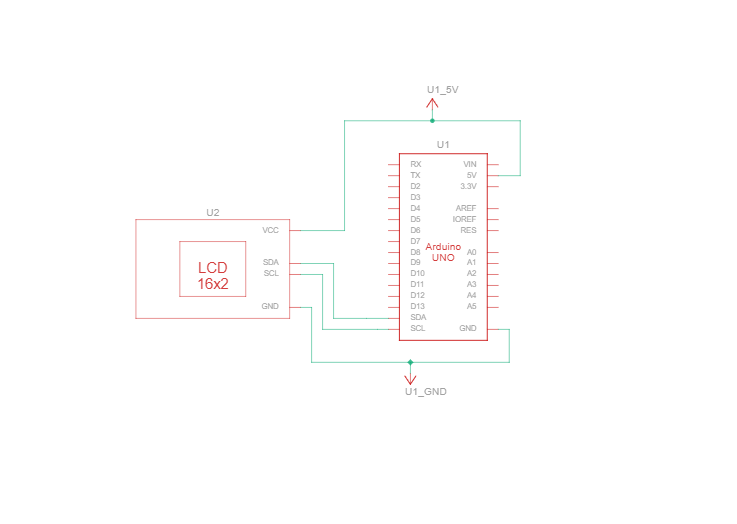
Circuit Diagram
💡Tip: This tutorial is for I2C LCDs with a 4-pin backpack (GND, VCC, SDA, SCL), not compatible with 16-pin parallel LCDs.
What You'll Need
- Arduino Uno x 1
- 16x2 LCD Display (HD44780 & PCF8574-compatible) x 1
- Jumper wires x 4
- Arduino Uno USB Cable A to B x 1
- Arduino IDE installed
Instructions
- Wire the LCD to the Arduino's SDA and SCL pins.
- Wire the GND and VCC pins from the LCD to the Arduino's GND and VCC pins.
- Plug your Arduino into your computer using the USB cable.
- Open the Arduino IDE and paste the code below.
- Select your board and port under Tools.
- Click Upload to see "Hello, World!" appear on the LCD.
The Code
#include <LiquidCrystal_I2C.h>

LiquidCrystal_I2C lcd(0x27, 16, 2);  // Matching Tinkercad address

void setup() {
  lcd.init();         // Initialize the LCD
  lcd.backlight();    // Turn on the backlight
  lcd.print("Hello, World!"); //Displays "Hello, World!"
}

void loop() {}
Schematic Diagram
Schematic diagrams show how current flows and how components connect logically, not just physically.