Tutorial 1 - Sweep a Servo
Learn how to make a servo motor sweep from 0° to 180° and back using an Arduino. This introduces you to PWM, delays, and external libraries like Servo.h.
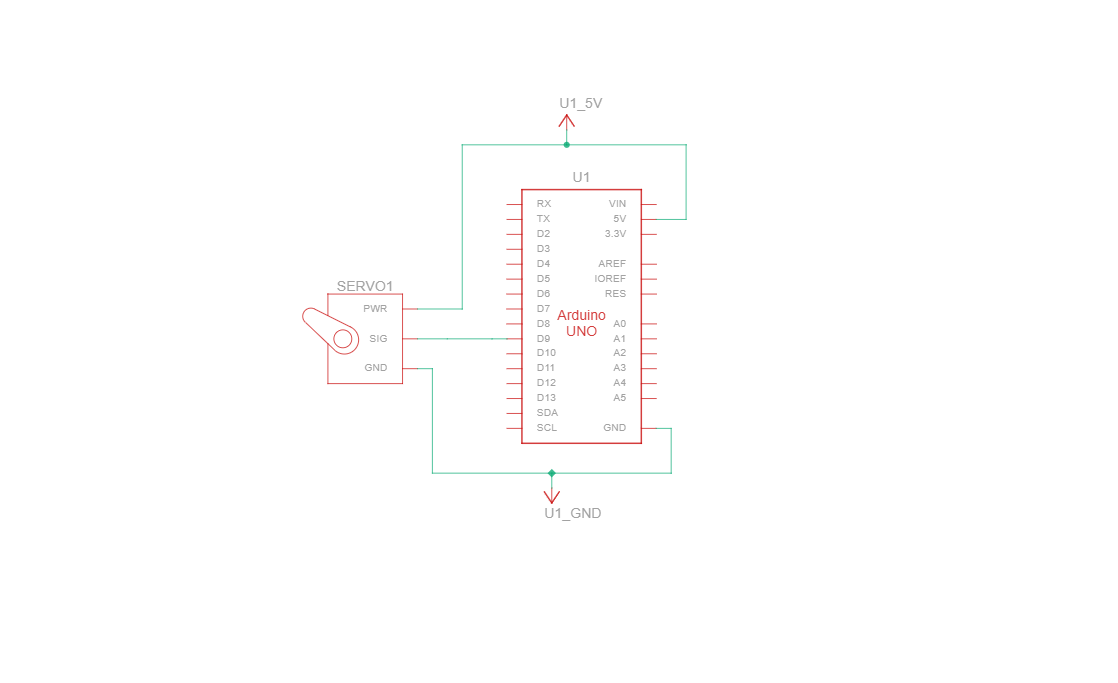
Circuit Diagram
💡Tip: Standard servo motors rotate up to 180°, and need their own 5V power if they glitch or jitter!
What You'll Need
- Arduino Uno x 1
- SG90 servo motor x 1
- Jumper wires x 3
- Arduino Uno USB Cable A to B x 1
- Arduino IDE installed
Instructions
- Connect the servo’s yellow wire to digital pin 9 on the Arduino.
- Connect the red wire to 5V.
- Connect the brown wire to GND.
- Plug your Arduino into your computer using the USB cable.
- Open the Arduino IDE, and paste in the code below.
- Under Tools, select your board type and COM port.
- Click Upload. Your servo should start sweeping!
The Code
#include <Servo.h> // Include the Servo library so we can control a servo motor

Servo myServo;  // Create a Servo object called "myServo"

void setup() {
  myServo.attach(9);  // Connect the servo signal wire to digital pin 9
}

void loop() {
  // Sweep the servo from 0 degrees to 180 degrees
  for (int angle = 0; angle <= 180; angle++) {
    myServo.write(angle);  // Move servo to the current angle
    delay(15);             // Wait 15 milliseconds to make the movement smooth
  }

  // Sweep the servo back from 180 degrees to 0 degrees
  for (int angle = 180; angle >= 0; angle--) {
    myServo.write(angle);  // Move servo to the current angle
    delay(15);             // Wait 15 milliseconds to smooth the return motion
  }
}
Schematic Diagram
Schematic diagrams show how current flows and how components connect logically, not just physically.